

The Screwdriver
The Screwdriver is located on the toolbar on the lower right hand of the screen. Before disconnecting any wire, lockout/tagout must be performed. If you attempt to use the screwdriver on a live circuit you will see the message below. After clicking on OK you will be exited from the simulation.

Toolbar Screwdriver
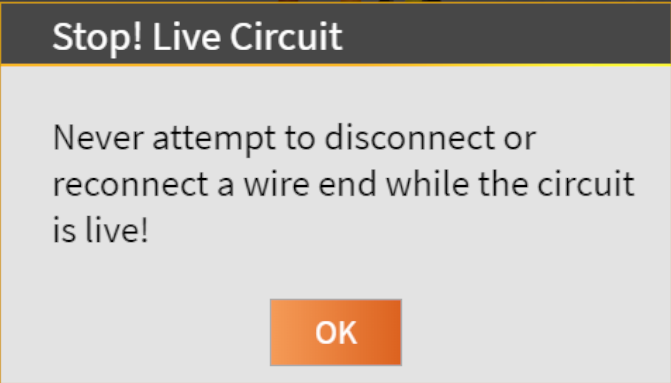
Zap Screwdriver message
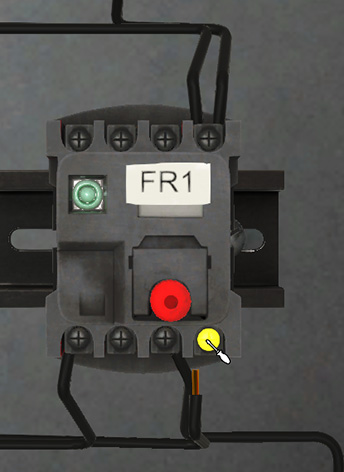
Disconnecting a Wire
Once the system is properly locked out/tagged out and LDL verified, click on the screwdriver from the toolbar on the bottom right hand of the screen. The cursor will change to a screwdriver.
Temp LEQ setpoint
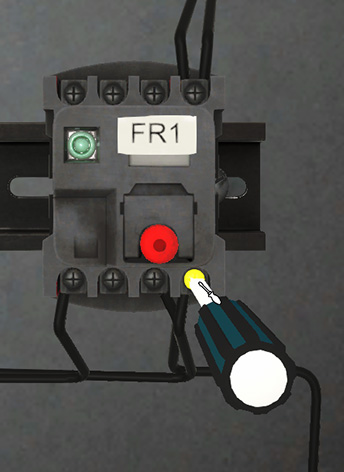
Hover over the screw holding the wire you want to disconnect until it turns yellow, then click. A large screwdriver will appear and disconnect the wire.
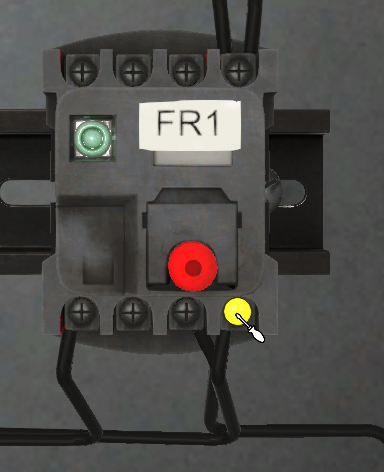
Screwdriver Disconnect 1
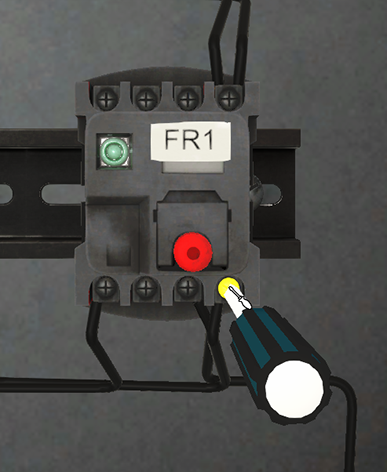
Screwdriver Disconnect 2
Reconnecting a Wire
To reconnect a wire, select the screwdriver from the toolbar and hover the screwdriver cursor over the disconnected wire until it turns yellow, then click. Next move over to the screw where you want it to be placed until it is highlighted in yellow and click again. If there are multiple wires under the same screw, use the same procedure, but attach the wires one at a time.
Temp LEQ setpoint
Hover over the screw holding the wire you want to disconnect until it turns yellow, then click. A large screwdriver will appear and disconnect the wire.
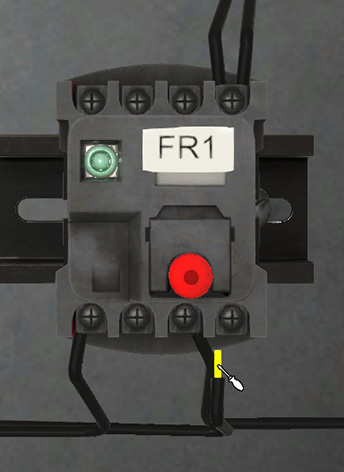
Screwdriver Reconnect 1
Screwdriver Reconnect 2
Screwdriver Reconnect 3