

Operating System
Starting and Stopping the System
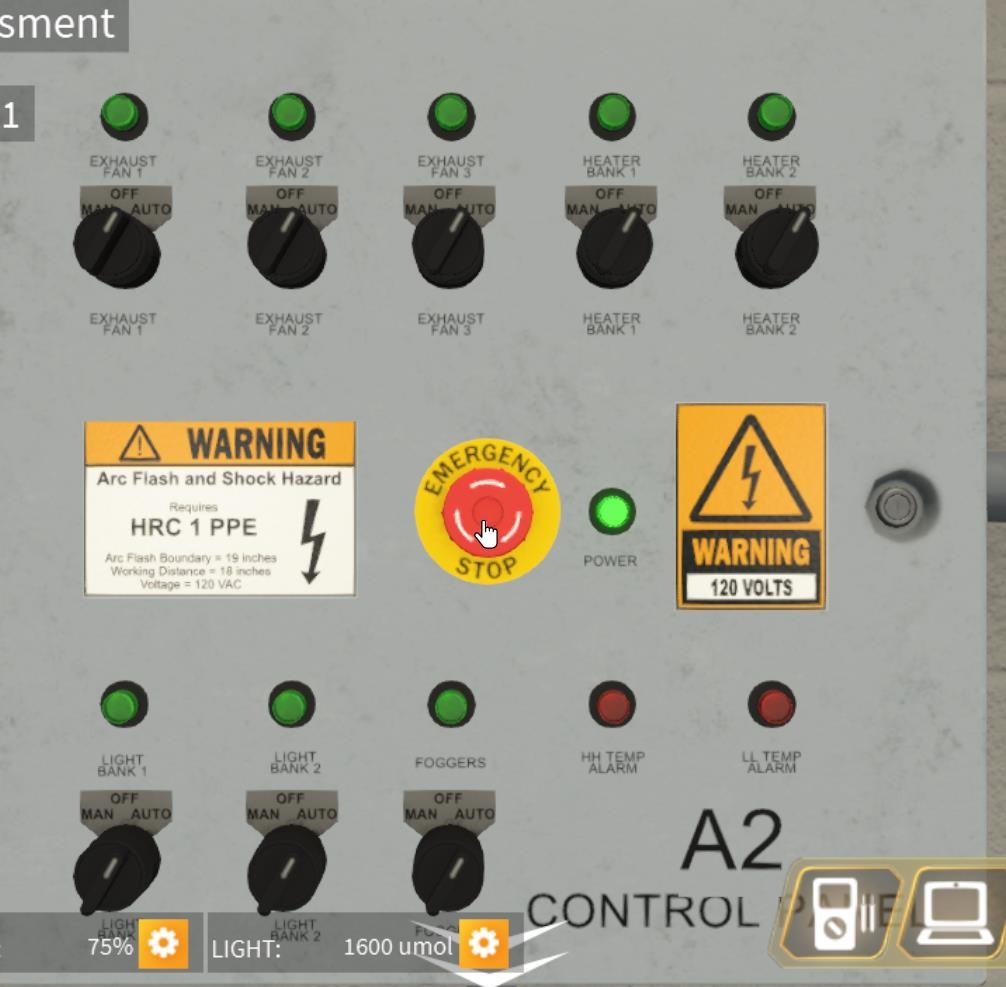
The Greenhouse Simulation is designed to run continuously. There is no “Start”. The process can be stopped by pressing the Estop button located in the middle of the control panel. This will terminate power to all outputs including the power light. The laptop program and PLC components within the Control Panel will appear to be operating normally. To return power after an Estop, click on the Estop button again. The button will pop out and power will be restored.
Control Panel Lid
Viewing and Adjusting Greenhouse Conditions
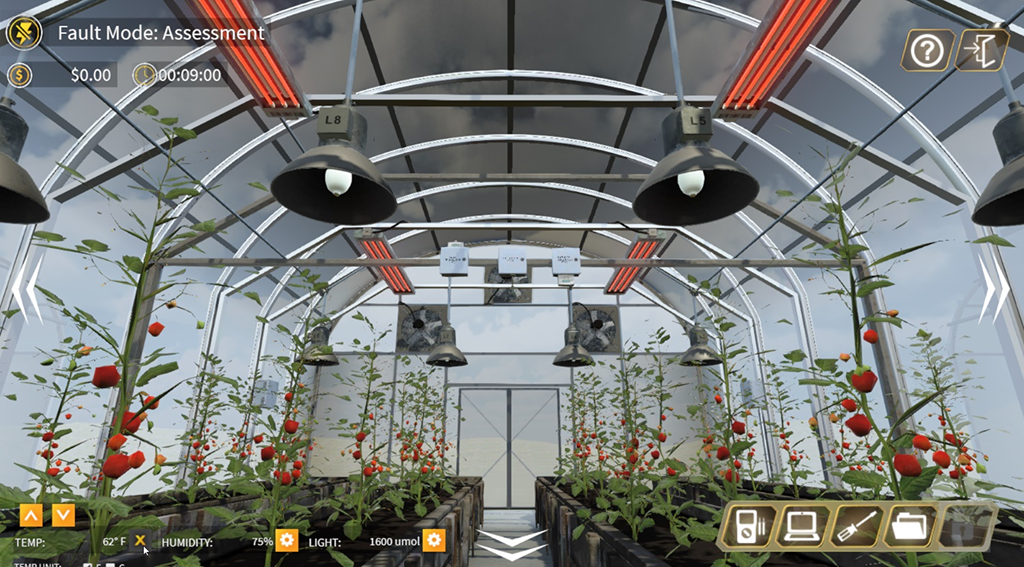
To aid in troubleshooting, a Greenhouse Conditions toolbar, located at the bottom left of the screen has been added. The user will be able to modify the temperature, humidity and light conditions in the greenhouse.
Changing these numbers in comparison to setpoint values found in the PLC program will help to identify a problem and verify that it has been resolved.
Setpoints can be found by opening the laptop and viewing the program or the Independent Tags listed in the Monitor Tags Window.

Temp LEQ setpoint

Monitor Tab Setpoints
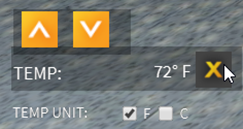
To change the present value, first click on the gear wheel of the condition you wish to modify.

Condition Adjust 1
Two arrows will appear, allowing you to adjust the value up or down.
Condition Adjust 2
Viewing and Adjusting Greenhouse Conditions Example:
You have a work order that requires you to verify that the heaters are turning on at the appropriate time.
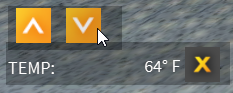
According to Greenhouse Program 1 on Rung 1, the Temp L SP required to turn on the heaters is 64°F.
Temp LEQ setpoint
Leave the Laptop open and observe Rung 1 while you adjust the temperature. Adjust the Greenhouse temperature downwards until it reaches 64°F. You should see that the Source A value changes to match the new environmental condition.
Condition Adjust 3
Once the environmental temperature has been adjusted down to 64, you should see that according to the program, the Heater Banks are now energized.
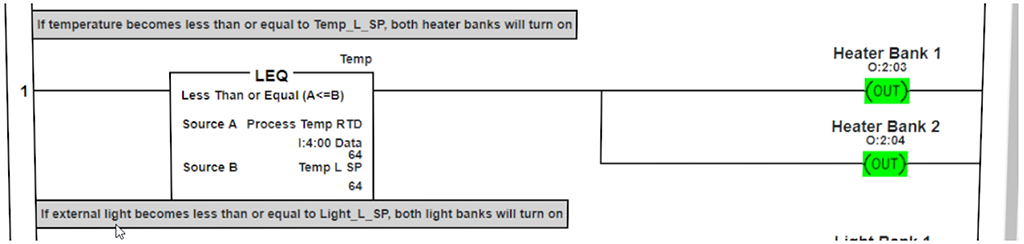
Heaters energized in program
You can verify by looking in the greenhouse to see if the heaters are on.
Heaters on in Greenhouse
Greenhouse Conditions Automatic Response
Greenhouse conditions will automatically increment in response to actuation of exhaust fans, heaters and foggers.
When both Heater Banks are turned on, heat will increment by 1 degree every 8 seconds. When only one heater bank is turned on, heat will increment by 1 degree every 15 seconds.
When the foggers are turned on, humidity will increment by 1 percent every 8 seconds.
When all three exhaust fans are turned on, heat and humidity will decrement by 1 (degree or percentage) every 8 seconds. When exhaust fans are staggered (only Exhaust Fan 2 is on), the decrement will be increased to 20 seconds.
Humidity and Light Transducer Displays
Zooming in on one of the transducers reveals a display that reflects the real time signal value being received by the sensor. If the system is functioning properly, this value should agree with the Greenhouse Conditions on the screen and should change to match if you adjust either value.
Light Transducer Display
Humidity Transducer Display

Greenhouse Conditions Toolbar 2
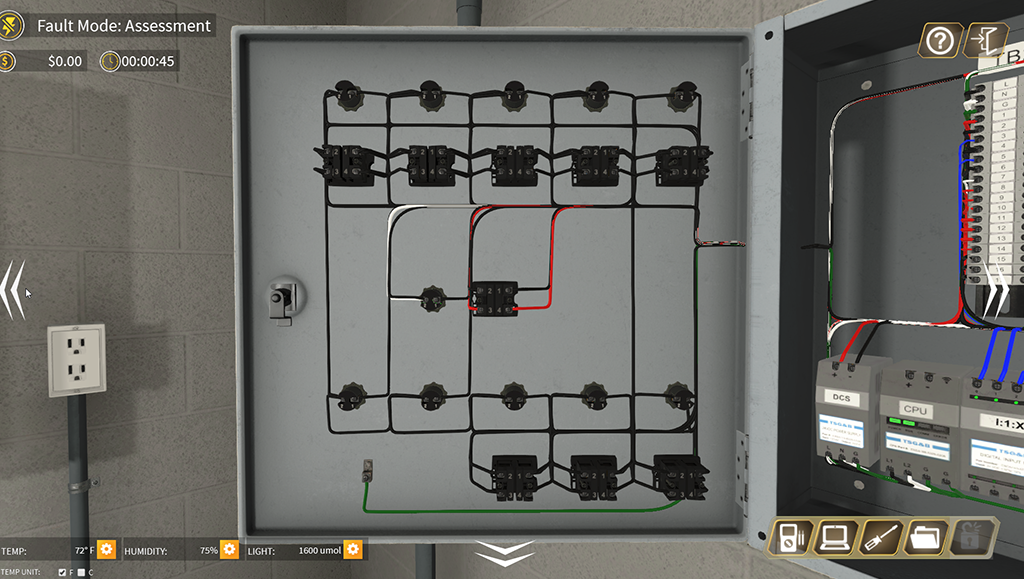
Opening an Enclosure
To open an enclosure, hover over the lock for that panel. The cursor will turn into a key. Click and the panel will open. To close an enclosure, click on the key again. This may involve zooming out or panning over to see the lock.
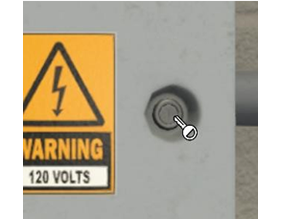
Enclosure Lock and Key
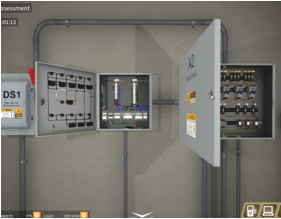
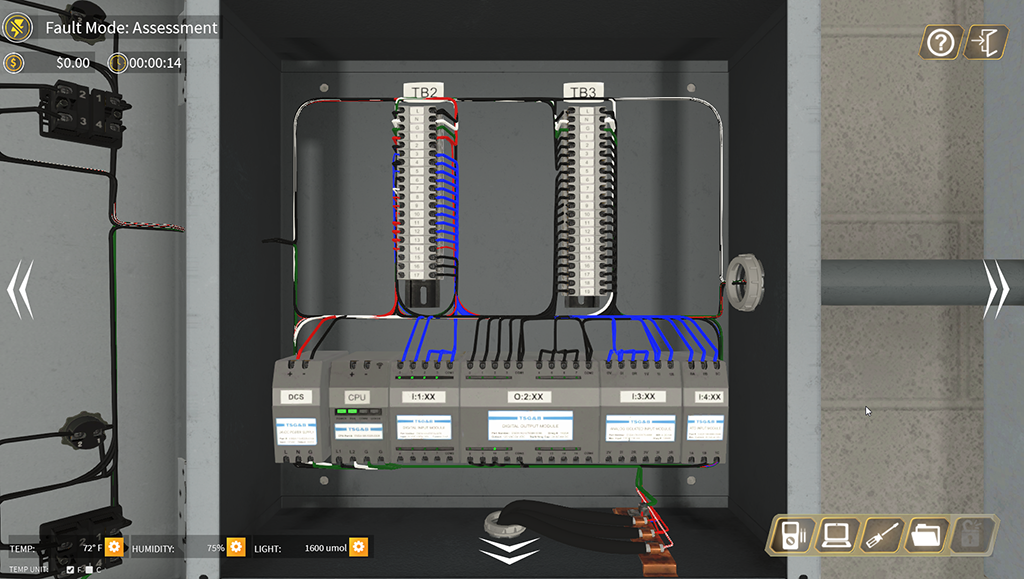
Opened Enclosures
Selector Switches
Manual control for testing of all output devices is provided through a series of three-way selector switches on the control panel offering MANUAL/OFF/AUTO modes. In Manual Mode, the device is ON and the indicator light will be lit. The PLC program will have no effect on its state. In OFF Mode, the device is OFF and the indicator light will not be lit. The PLC program will have no effect on its state. In AUTO Mode, the PLC will have full control of the device.
For troubleshooting and testing purposes, the back of the Control Panel Lid may be accessed by first opening the panel door and then clicking the double arrows on the bottom.
Control Panel Lid
Control Panel Inside
Control Panel Back of Lid
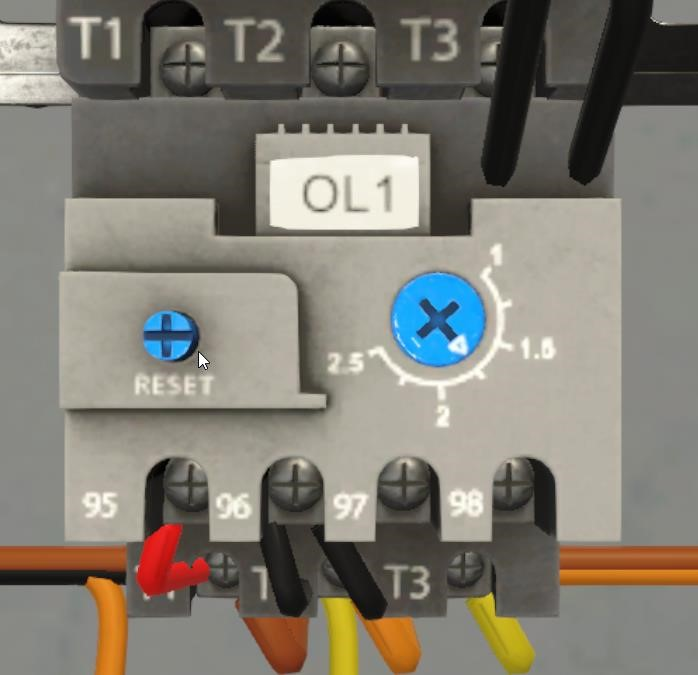
Resetting an Overload
A tripped Overload can be reset by pressing the reset button on the overload. Once an overload trips, it will take 8 seconds before it can be reset.
Control Panel Back of Lid
Manually Operating Contactors
The Contactors can be manually operated by pushing the manual actuator. Attempting to manually operate the manual actuator without first locking out and verifying with LDL will result in the message below. Clicking on OK will return you to the simulation.
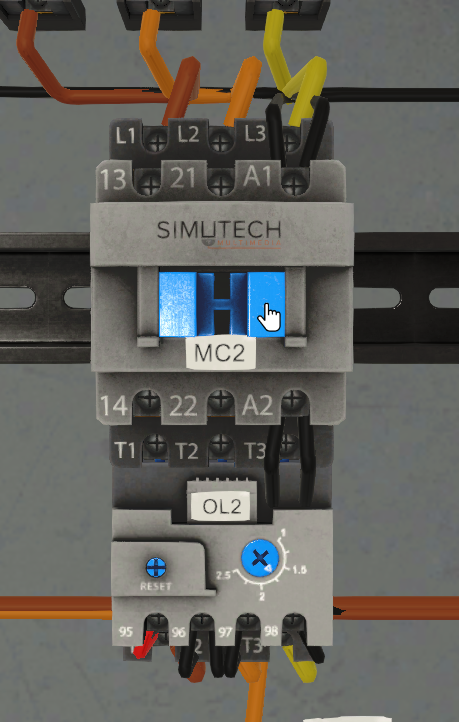
Contactor Manual

Warn Man Actuation Live
Manually Operating Relays
Relays can be manually actuated as well by pressing the red test button on the relay. Again, the system must be locked out and verified with LDL before attempting to press the test button. If the button is pressed without locking out first, the same warning message will appear as with the Contactor Manual Actuator.
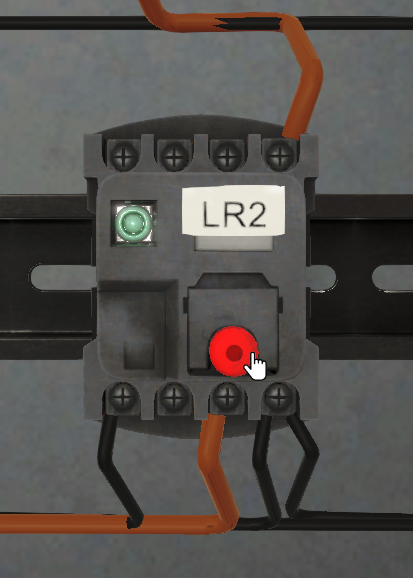
LR2 Reset
Warn Man Actuation Live