
Tools
Multimeter
The Multimeter is a vital tool for diagnosing problems with the process.
The multimeter allows you to:
- Take voltage readings
- Take resistance readings
Accessing Meter
The Multimeter can be accessed by clicking on the meter icon located on the toolbar at the bottom left side of the screen. The meter will remain on screen until the icon is clicked again.
Moving Meter
The meter can be moved around the page by clicking on the meter and holding the left mouse button down while dragging the meter to a desired location on the screen.
Selecting Meter Functions
For voltage readings, choose Volts (AC) by clicking on the first position after the OFF position.
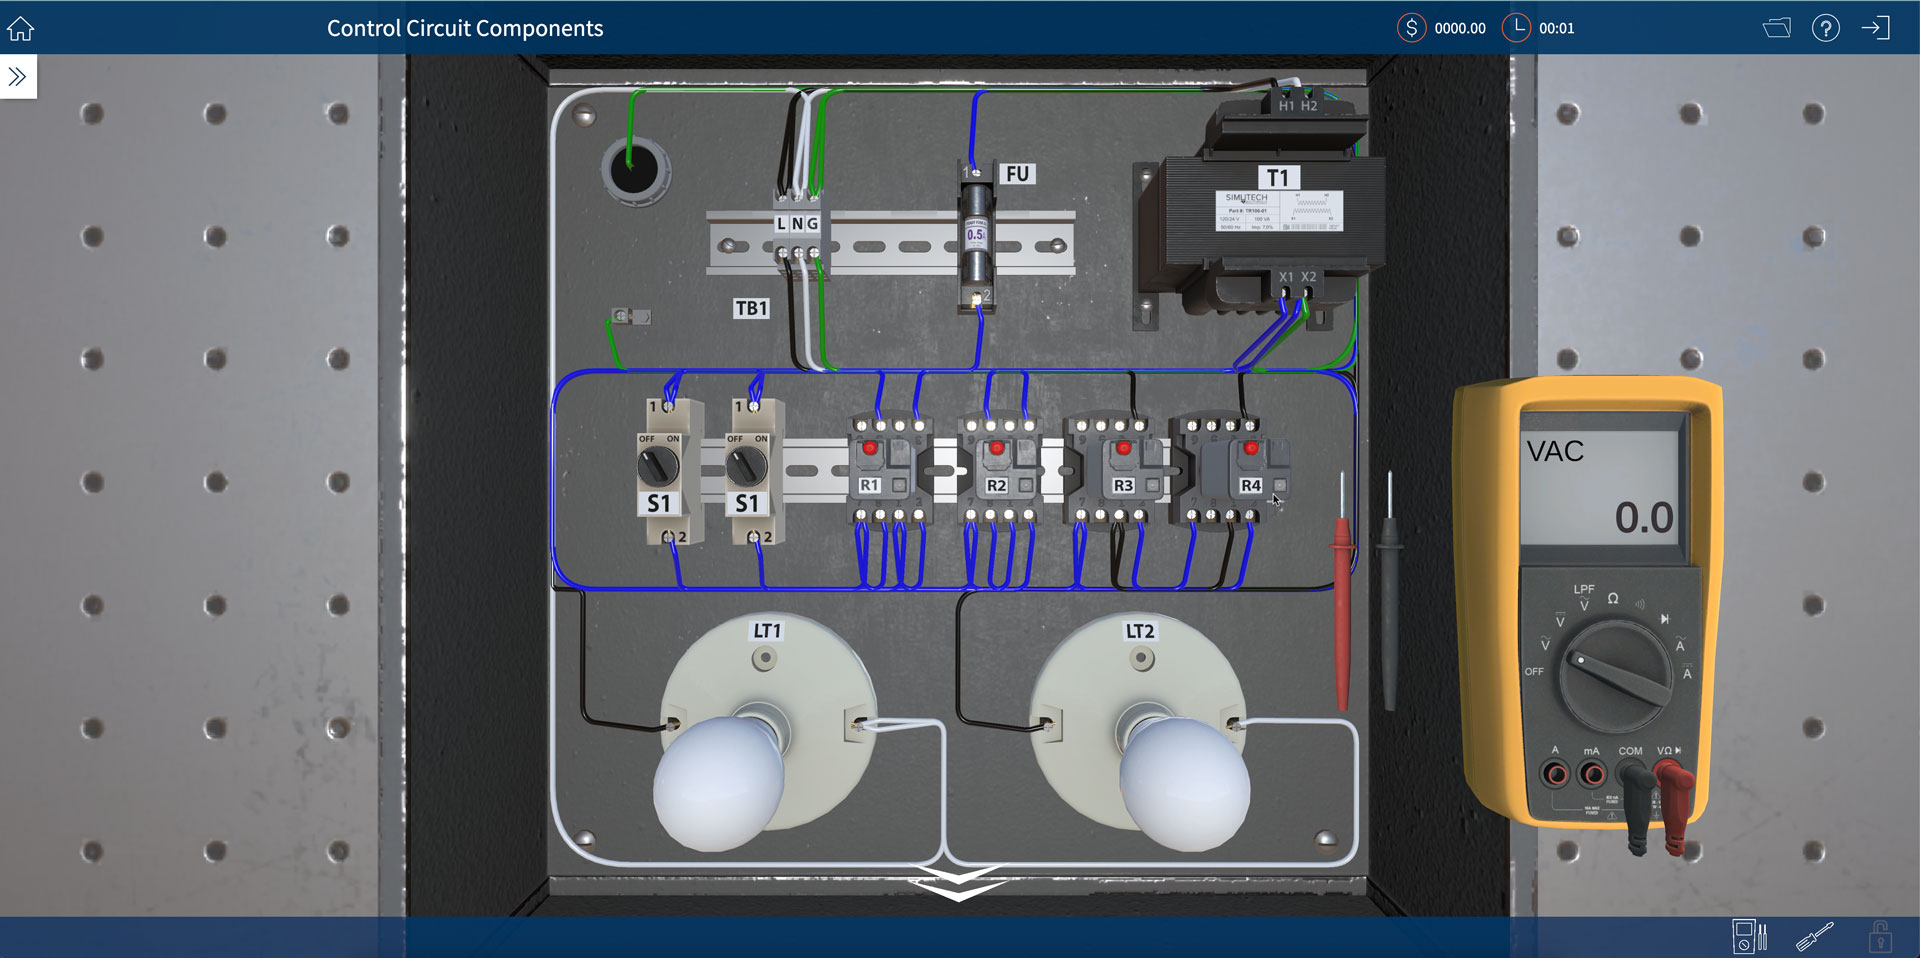
Positioning the Leads
Once the meter appears, choose a lead by clicking on it and holding the left mouse button until the cursor changes to the lead you selected. To place a lead, hover over the screw or wire you wish to connect to until it glows yellow and then click. The selected meter lead will automatically attach.
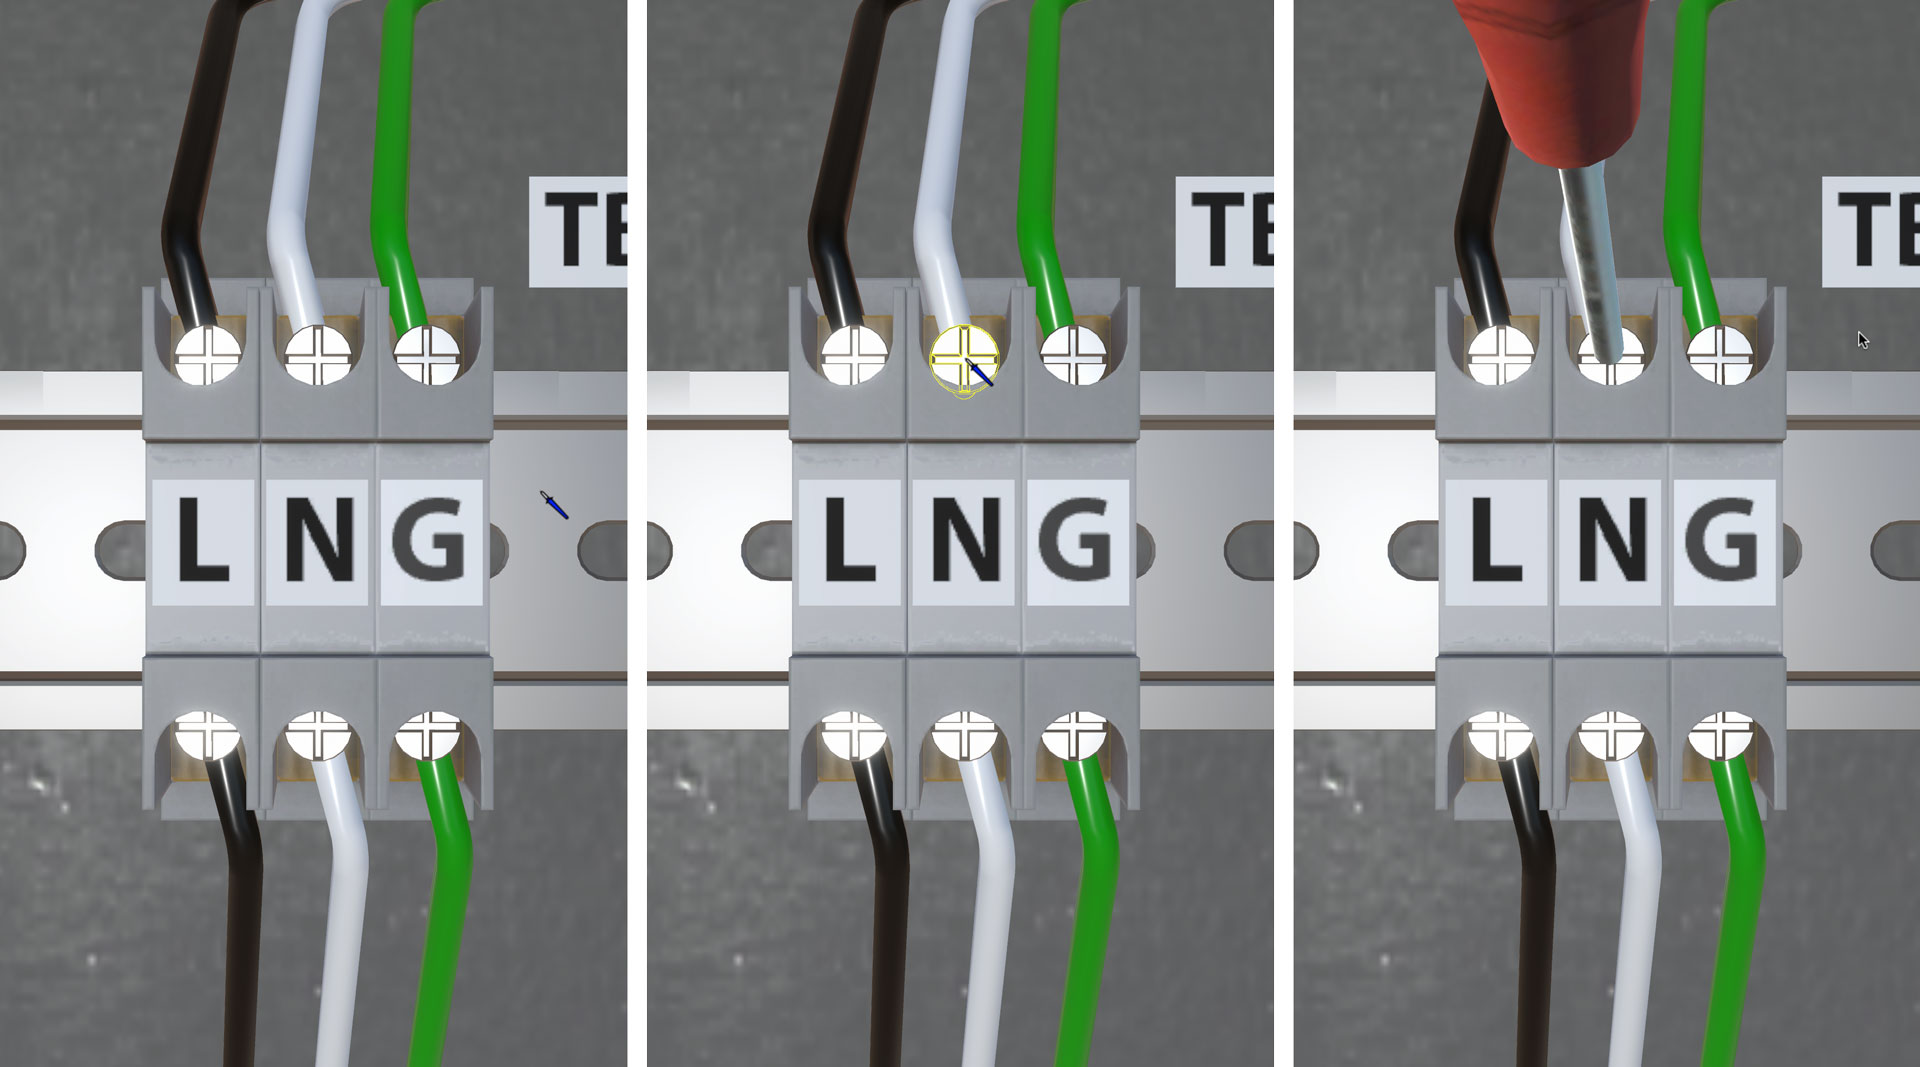
Putting Meter Away
The meter will remain on screen until the icon is clicked. Click on the meter icon in the bottom right hand of the screen and the meter will disappear from the screen.
Taking Voltage Readings
Voltage measurements are taken on live circuits. There is no need to Lockout the system or LDL. Click on the meter icon to display the meter and set to Volts (AC). Place the leads across the measurement point.
Taking Ohmmeter Readings
Lockout the circuit and verify with LDL. Set the multimeter to read resistance. Disconnect at least one wire. Resistance measurements must be taken on a locked-out circuit.
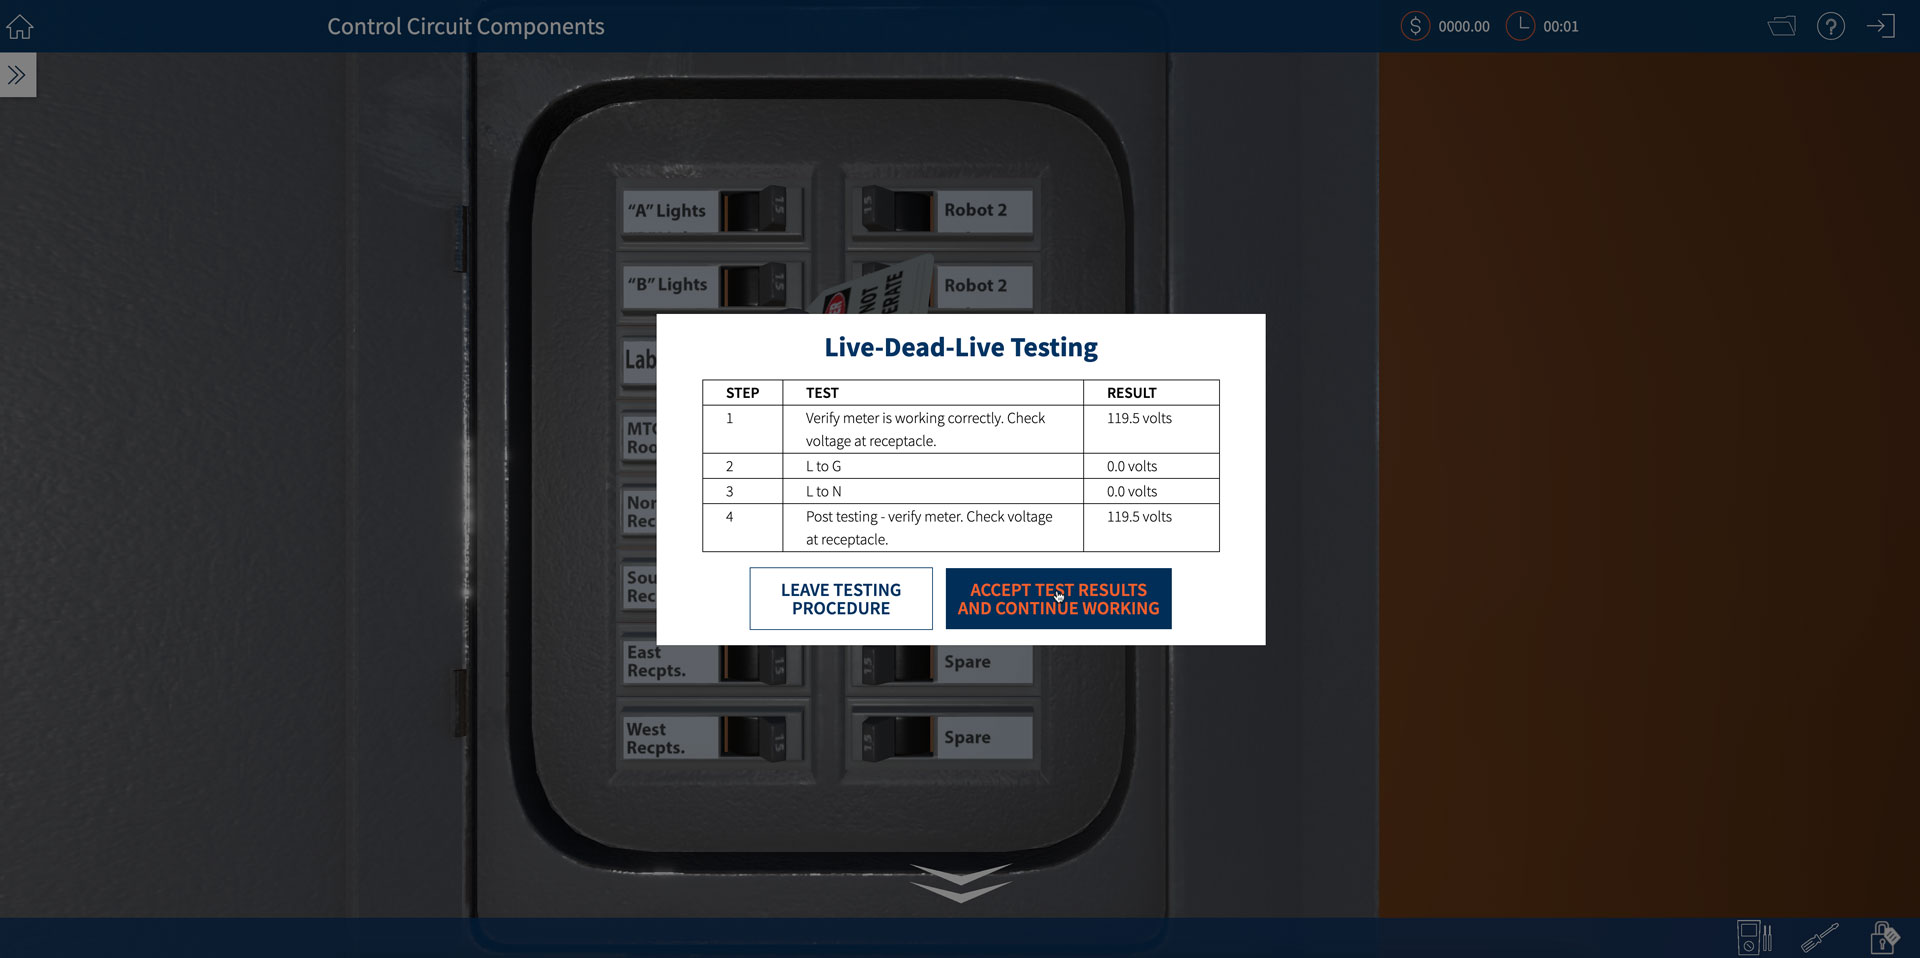

Meter Tips
Meter tips will appear to guide you towards safer meter habits.
If you do remove more than one wire you will receive the following message:
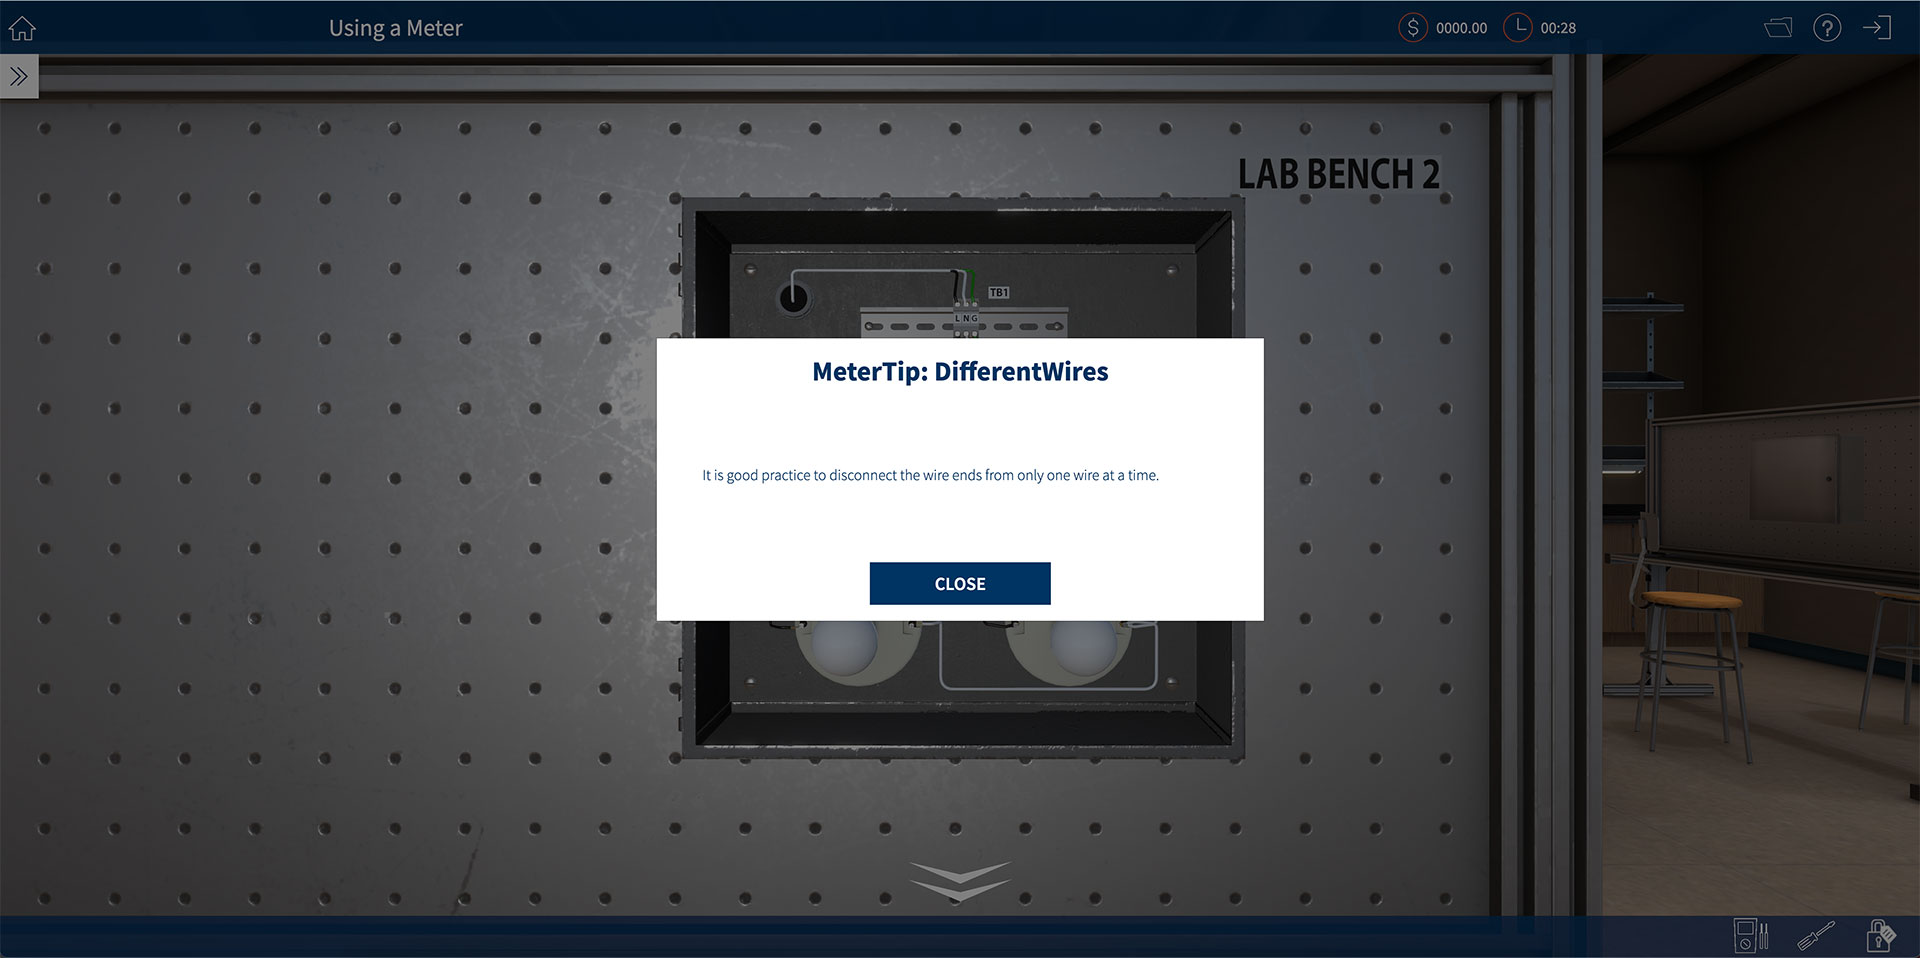
When taking an action that generates a meter tips, the simulator shows a message and allows the action to occur.
Screwdriver
Accessing Screwdriver
The Screwdriver is located on the toolbar on the lower right hand of the screen. Before disconnecting any wire, lockout/tagout must be performed.
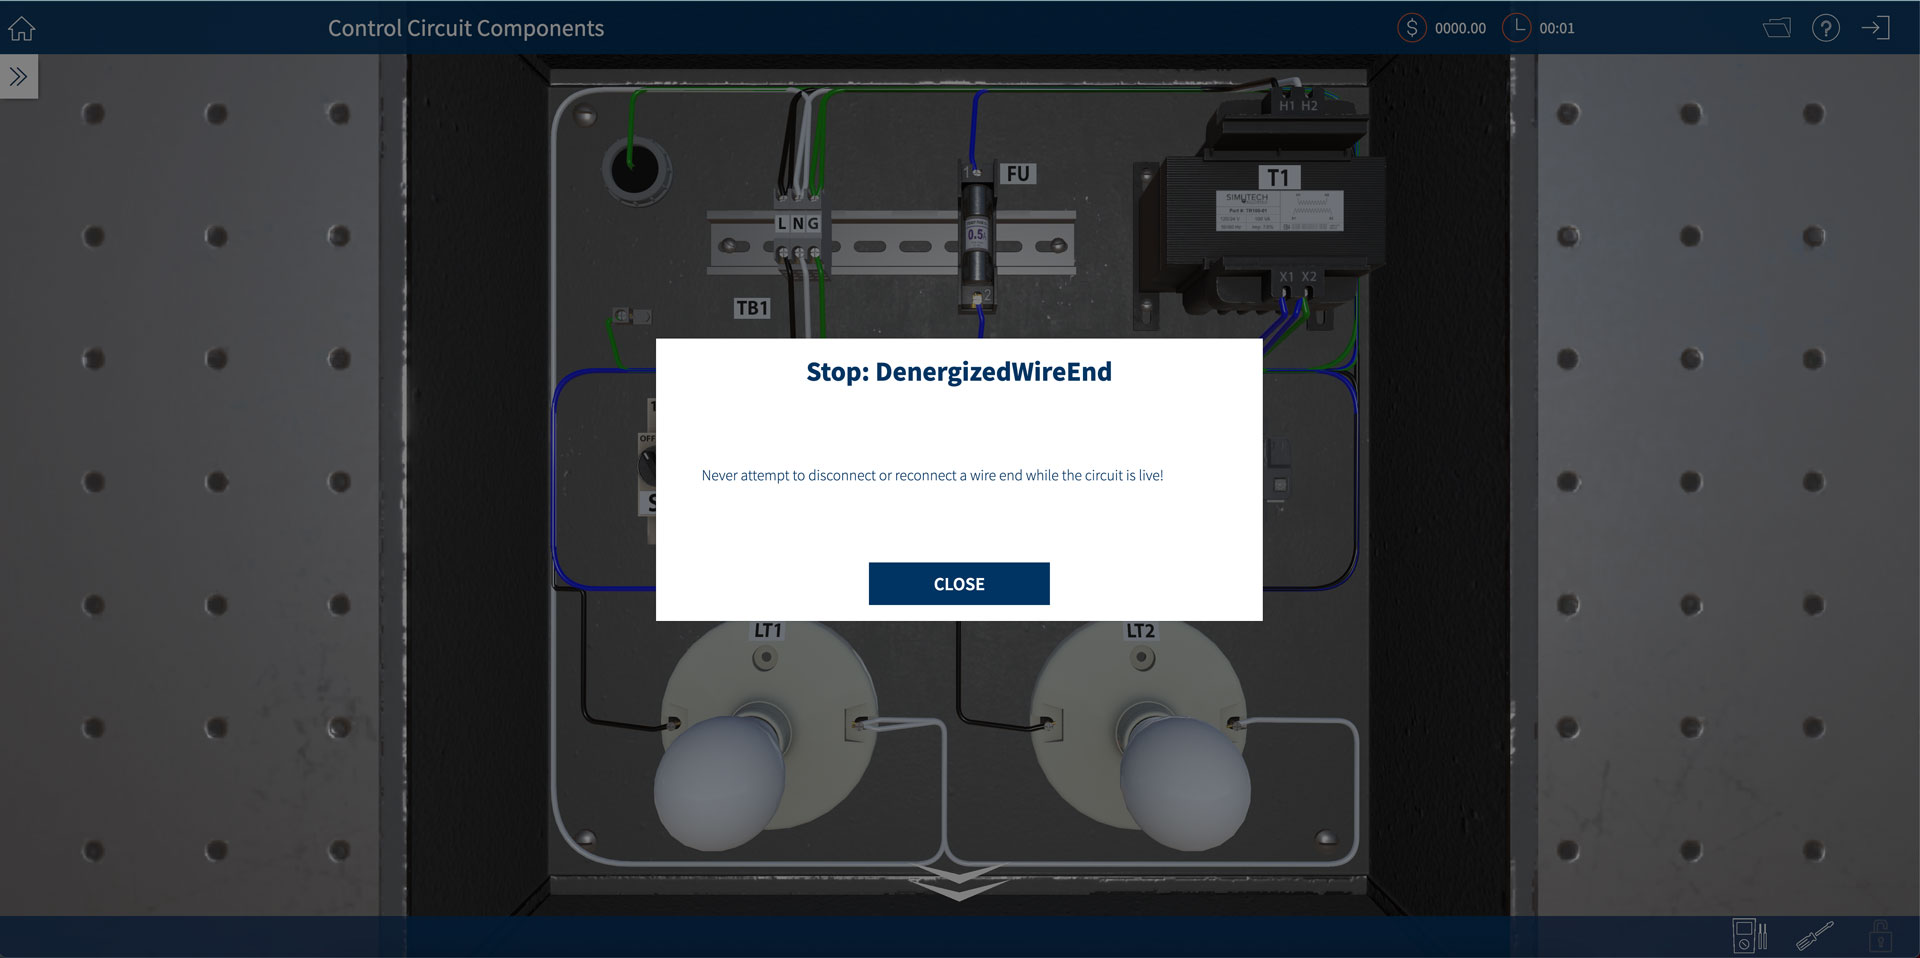
If you attempt to use the screwdriver on a live circuit, you will see the Personal Injury message below. After clicking on Close, you will automatically exit the fault.
Disconnecting a Wire
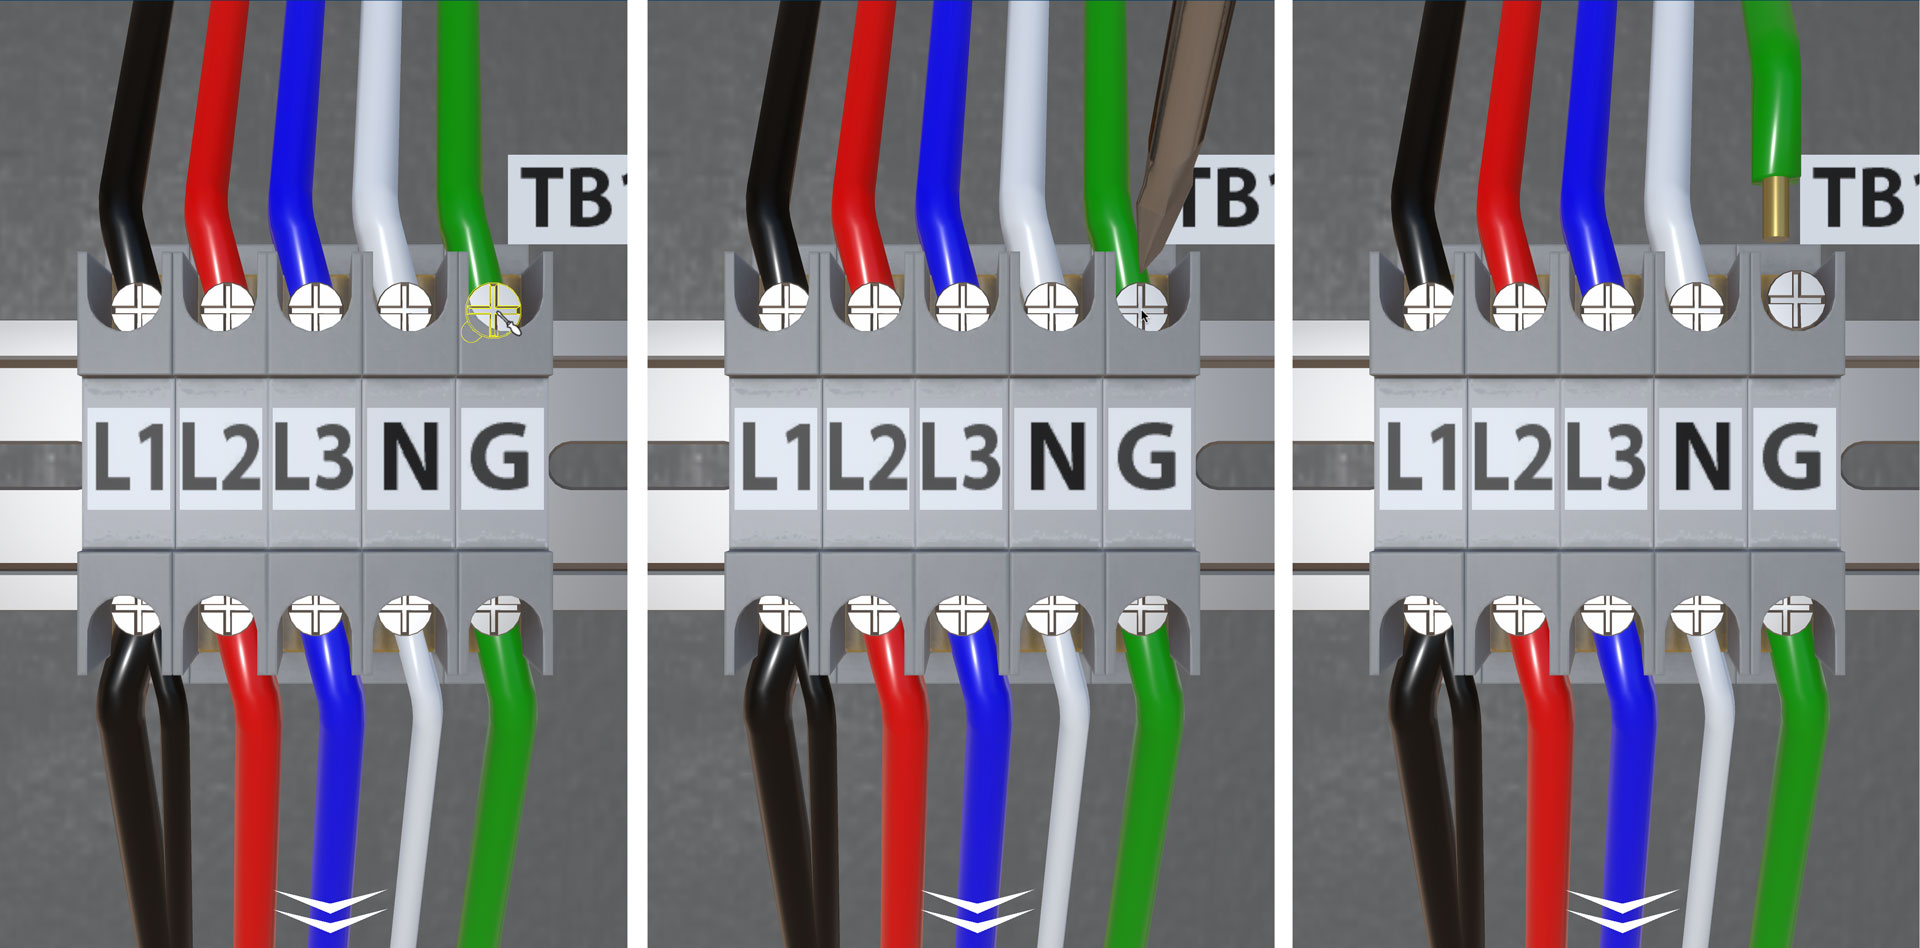
Once the system is properly locked out/tagged out and LDL verified, click on the screwdriver from the toolbar on the bottom right hand of the screen. The cursor will change to a screwdriver.

Hover over the screw holding the wire you want to disconnect until it turns yellow, then click. A large screwdriver will appear and disconnect the wire.
Reconnecting a Wire
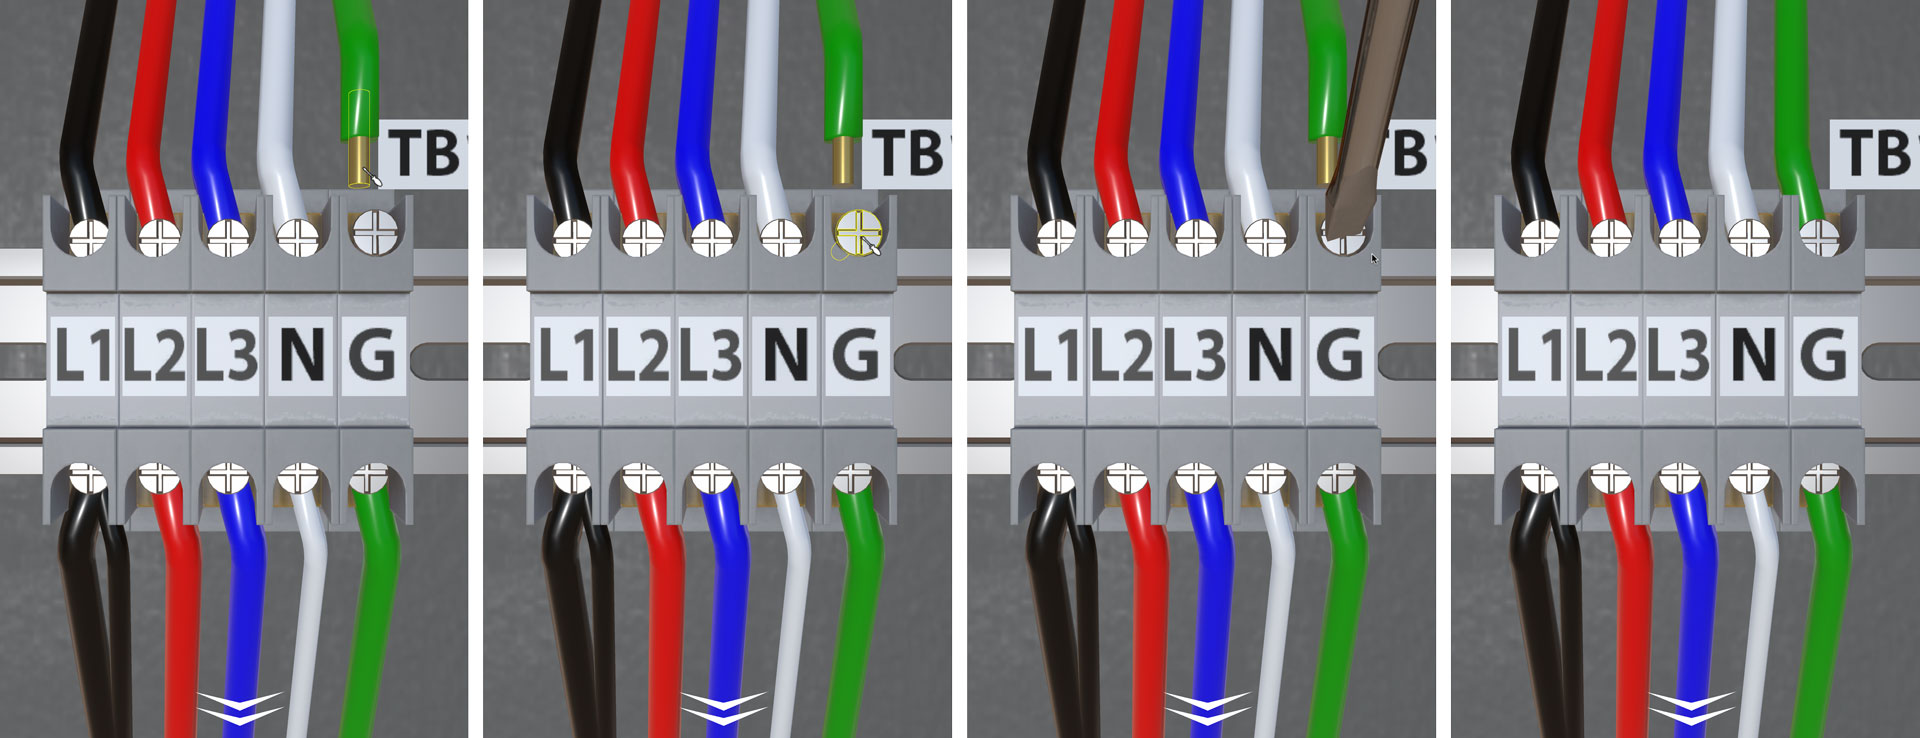
To reconnect a wire, select the screwdriver from the toolbar and hover the screwdriver cursor over the disconnected wire until it turns yellow, then click. Next move over to the screw where you want it to be placed until it is highlighted in yellow and click again. If there are multiple wires under the same screw, use the same procedure, but attach the wires one at a time.
Putting Screwdriver Away
Click on the screwdriver from the toolbar on the bottom right hand of the screen and the screwdriver and screwdriver cursor will disappear from the screen.
